Falling Sand Abrasion Tester

Category:
[ssba]
INQUIRY
Ⅰ. Working Principle:

LS Falling Sand Abrasion Tester is applicable to determine abrasion resistance performance of organic coating. The abrasion resistance performance is determined by increasing a amount of falling sand until the coating is removed from the substrate.This machine is applicable to evaluate crack resistance and detachment from the metal substrate of coated surface which is coated with paint. The resistence to abrasing is calculated as the abrasive loss in mass per film. It complies with ASTM D 968-83 and JG/T 133-2000 standards.

Ⅱ. Main Technical Parameters:

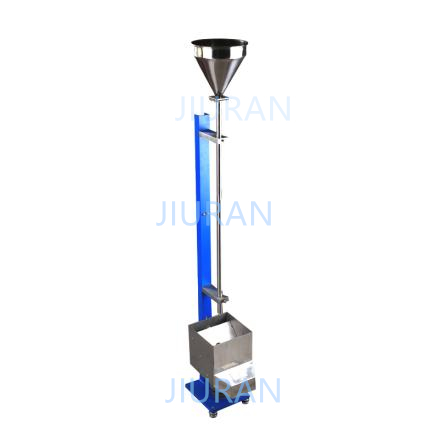
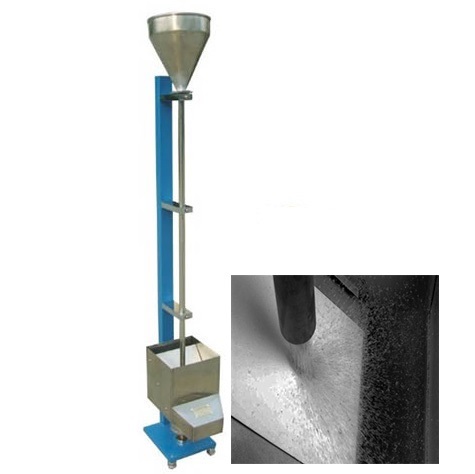
1.Structure (see outline drawing)
Falling Sand Abrasion Tester is made of hopper(1); switch of falling sand(2); support frame(3); conduct pipe(4); clamp(5); box(6) and adjusting screw(7).
2. Parameters:
a. Overall dimensions: 230×200×1500 mm  (length by width by height)
b. Length of conduct pipe: 36 inches (914mm)
c. Inner diameter of conduct pipe: 0.75 inches (19mm)
d. Weight of whole machine: 25kg

Ⅲ. Introduction:

Falling Sand Abrasion Tester produced by our company is in accordance with ASTM, it is easy to use. A switch(2) of controlling sand flow is set around conduct pipe(4), there is box(6) holding 450 panel under conduct pipe. On the both side of box, there are clamps(5) used for gripping panel. Adjusting screw(7) on the bottom of instrument is used for adjusting central position of sand flow.

Ⅳ. Preparation:

1.Put test panel under temperature (23±2)℃, relative humidity (50±5)% for 24 hours.
2.Calibrating instrument:
(1). Pour a certain amount of sand into hopper(1), check sand flow, calibrating unit by adjusting screw(7) until a cluster of sand on the center of conduct pipe. Pour a certain amount of sand (2000±10ml), test flow time, flow speed should be 21s-23.5s/2L.
(2). Clamps(5) are used for gripping panel, increasing a amount of falling sand until the coating is removed from the substrate, circle-dot{diameterΦ5/32 inch (4mm)}appears on the substrate. The whole abrasion area is a 1.25 inch (30mm)×1 inch (25mm) ellipse. The center of the largest abrasion area is on the central line of major axis of abrasion area and within 9/16-11/16 inch (14-17mm) of upper end.
(3). Panel is gripped by clamps(5)-used for gripping panel, there is a small hole -5/32 inch (4mm) on the panel. The center of hole aims at the center of conduct pipe. If 90%-93% amount of sand are falling on the panel, the instrument is regarded as standard.

Ⅴ. Test Procedure:

1. The test should be carried out in at least three different circular areas{diameterΦ1 inch (25mm). Repeat three tests on the different locations of test panel (total 3 falling sand points).  Record average abrasion resistence value.
2. Clamps(5) are used for gripping panel on the support frame(3), adjusting panel until marked area is under the center of conduct pipe. Pour a certain amount of sand into hopper(1), open switch of falling sand(2), let sand go through conduct pipe and impact on the panel. The container on the bottom of instrument is used for collecting falling sand. Repeat above procedures until the coating area{diameterΦ5/32 inch (4mm)}is removed from the substrate. During testing, sand is applied in 2000±10ml increments. When closing terminal point of test, Pour 200±2ml sand into hopper(1).
3. According to the equation, abrasion resistence value is the quotient

A=V/T

Where:
A- abrasion resistence value, μm/L
V- abradings in mass, L (with an accuracy of 0.1L)
T- coating thickness, μm(with an accuracy of 0.1μm)
Calculate (average value) of abrasion resistence value on the three different locations of test panel.

Ⅵ. Note:

1.In order to ensure a cluster of sand on the center of conduct pipe. The alignment of the conduct pipe should be checked every 25 times.
2.After sand going through conduct pipe, remove fine sand by No.30 fine screen. After using 50 times, sand should be exchanged.
3.In order to get high degree of precision’s tesst result, buyer and seller should use the same source’s sand.